Our editors pick the products and services we write about. When you buy through our links, we may get a commission. Learn more.
How To Grow Marijuana – A 9-Step Guide


Why You Can Trust American Marijuana
American Marijuana has been a trusted cannabis site since 2014, with a team of experts in the field working to ensure you’re only receiving premium quality information
Shopping list
Every grow starts with the right equipment. From lighting and fans to soil and seeds, the gear you choose will shape your results.
Indoor

Indoor grows cost more upfront because you supply everything the plant needs. This gives you full control over the environment and can lead to higher-quality buds. Here’s what you need:
- Grow tent or grow box—Not required, but highly recommended. Tents are affordable and give you control over conditions. Grow boxes cost more but can automate parts of the process.
- Lighting—Light fuels growth. LED grow lights are the best option today. Choose based on tent size, plant count, power use, and light spectrum. Full-spectrum lighting works best.
- Genetics—Strong plants start with quality seeds. Beginners should look for feminized autoflower strains, which simplify the growing process and ensure female plants. Many seedbanks ship directly.
- Pots and soil—A 5-gallon bucket works fine for pots. For soil, loam is a reliable choice, but growers also use perlite or coco blends. Living soil, which contains helpful organisms, is popular for its ability to boost plant health and bud quality.
- Fans and controllers—airflow is key. Use duct fans and controllers to manage humidity, temperature, and circulation.
- Testers and monitors—Tools like humidity gauges, thermometers, pH testers, and TDS meters help you measure conditions and adjust when needed. While optional, they improve results.
- Nutrients—Cannabis requires nutrients for each stage of growth. Use one formula for the vegetative stage and another for the flowering stage. Popular brands include DynaGro and Botanicare.
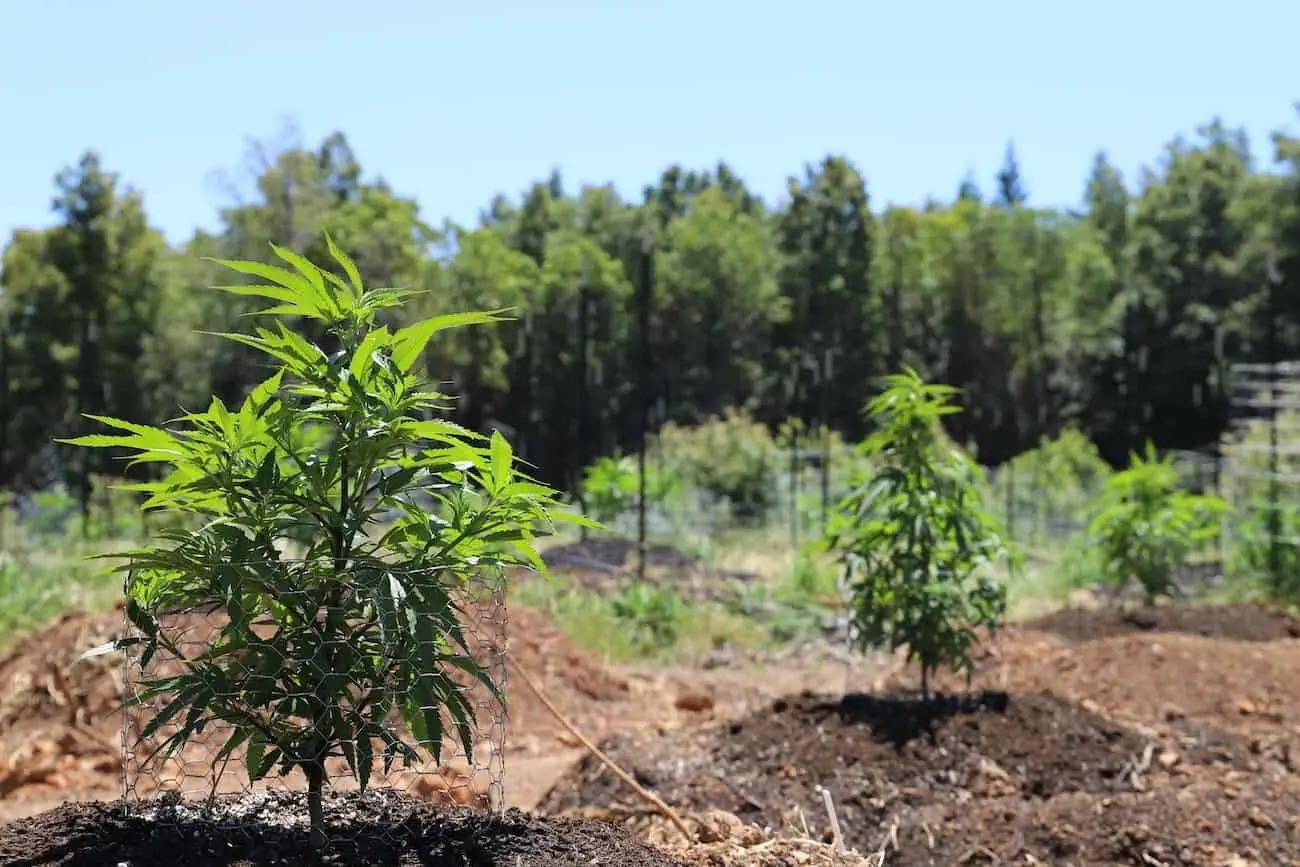
Outdoor
Outdoor grows are simpler. Sunlight, natural airflow, and seasonal conditions provide most of what your plants need. To get started, all you need is:
- A secure location
- 12-hour daylight cycles
- Quality soil
- Marijuana seeds
Choose your grow location
The first step is deciding whether to grow indoors or outdoors. Indoor grows offer privacy and greater control, making them easier to manage for beginners. Outdoor grows are harder to hide and depend on the weather, but they can be more affordable and yield larger harvests.
Most growers agree that indoor cannabis produces higher-quality buds. However, if your goal is to make concentrates or edibles, outdoor grows may be the smarter choice since they deliver more volume at a lower cost.
For indoor setups, you can choose between grow tents, grow boxes, or DIY options like a converted closet or space bucket. The right choice depends on your budget and how much automation you want.
Germination
Germination is the first step when you learn how to grow marijuana from seed. The goal is simple: get your seeds to sprout so they can be planted in soil or another medium.
Here are three common methods:
- In water – Place seeds in a glass of filtered water. Change the water every two days until sprouts appear.
- In paper towels – Place seeds between damp paper towels. Keep them moist and check daily. Once roots show, they’re ready to plant.
- In soil – The easiest method. Plant seeds directly into moist soil and wait for them to sprout.
As soon as you see a root emerge, move your seeds into their growing medium.
Transplant to Growing Medium

Once your seeds have sprouted, post-germination, it’s time to move them into your soil. This part is relatively easy – you want to make sure the root is facing downwards, and bury the seed under a small amount of soil. It should be covered, but not too deep under the surface – you don’t want to make it too difficult for your seedlings to sprout from the soil.
Some growers swear by Rapid Rooters, especially for hydroponic grows, but they are not strictly necessary. You can definitely just plant your seeds directly in the soil they’ll grow in.

After germination, watch your soil for sprouts. If a seed hasn’t broken through within 10-14 days, it likely won’t survive. This is normal, so always plant extra seeds to improve your odds.
Once seedlings are in the soil, place them under grow lights. Light supplies energy and warmth, both crucial at this stage.
Be careful with transplanting. Young plants are fragile, and too much moving can stress or kill them. Start with plain soil that has no added nutrients; seedlings are sensitive and don’t need extra feeding yet.
Lighting also requires balance. A simple test is to hold your hand at plant level under the light for 10 seconds. If it feels too hot for your skin, it’s too hot for your seedlings. Adjust by lowering the light intensity or raising the fixture. As plants stretch toward the light, keep adjusting the distance so they don’t burn.
Water lightly. Keep soil damp but never soaked, as overwatering can stunt or kill seedlings.
Once your plants push through this delicate stage, they’re ready for the vegetative stage.
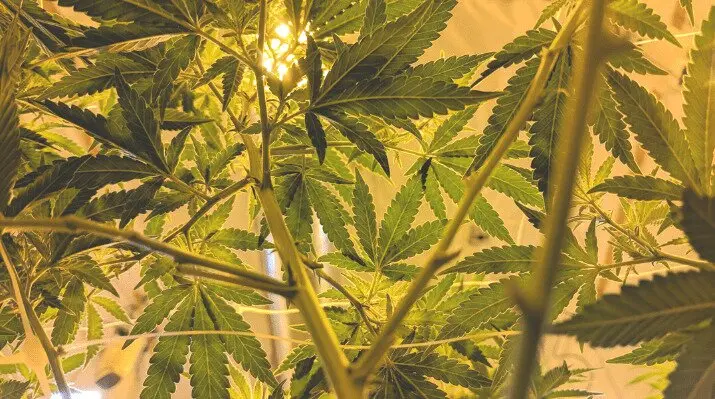
Vegetative Stage
The vegetative stage is when your cannabis plants build their size and strength. Stems and trunks thicken, and leaves spread across the plant. This stage sets the foundation for the large colas that form during flowering.
During vegetation, you should:
- Provide strong light for 18-24 hours each day.
- Water when the soil feels dry or pots feel lighter than usual.
- Use nutrients designed for the vegetative stage.
Keep plants in this stage until they reach about half their final size. Around this time, you’ll also be able to identify plant sex. Remove male plants right away; only females produce buds. If males pollinate females, they create seeds and reduce potency.
Topping
Topping is a simple training method that increases yield by creating more main colas. A topped plant can produce several times more buds than an untrained plant.
To top your plant:
- Wait until the main stem has at least 6 nodes (nodes are points where leaves or branches form).
- Cut the stem just above the 6th node. Some growers cut above the 4th, 5th, or 7th, but the 6th is a safe choice.
- Leave a small portion of the stem above the node rather than cutting flush.
This process encourages the plant to grow two main stems instead of one, boosting bud production.

LST
Low-stress training (LST) exposes more of the plant to light, which helps it grow stronger stems and larger buds.
How to apply LST:
- Bend the main stem gently and tie it down so the side nodes point upward.
- Use clips, twine, or twist ties, but avoid pulling too hard or tying too tight. You don’t want to snap stems or cut into them.
- Secure ties to the pot or bucket, not the grow tent, so you can move plants easily.
- As the plant grows, repeat the process by tying new sections away from the main stem to maximize light coverage.
LST works best early in vegetation while stems are flexible. With regular adjustments, side nodes can develop into full stems, producing multiple large buds.
Once your plant reaches half its intended size (usually about 60 days from sprout), it’s ready to move into the flowering stage.

Flowering Stage
This is the stage where cannabis plants begin producing flowers. If you’re growing with photoperiod seeds, you’ll need to adjust the light cycle to trigger flowering. If you’re using autoflower seeds, no changes are needed; they switch into flowering on their own.
For photoperiod plants, reduce light exposure from 18-24 hours per day down to 12 hours per day. The dark period must be continuous – 12 straight hours of darkness is what signals the plant to begin flowering.

At this stage, start feeding your plants with bloom nutrients. The first three weeks are a transition phase as your plants adapt to the new light cycle. You’ll notice rapid vertical growth during this period, which is normal and desirable. If branches stretch too close to the light, you can continue gentle low-stress training (LST) to manage their height.
By weeks three and four, small buds will begin forming. These first appear as clusters of white pistils, then gradually swell and take shape. Over the next several weeks, the buds will bulk up and mature.
Flowering typically lasts around 12 weeks, though timing can vary depending on genetics and growing conditions. As the buds develop, keep an eye out for the visual signs that tell you it’s time to harvest.
Harvest
Once the flowering stage is complete, it’s time to harvest your cannabis. The key indicator is trichome coloration.
Trichomes are tiny resin glands that cover the buds and some leaves. They’re a major source of cannabinoids, and their color tells you when the plant is ready. To check them, use a jeweler’s loupe or magnifying glass. Trichomes start out clear, then turn milky white, and finally amber as they age.
Most growers consider the ideal harvest point to be when 30-50% of trichomes have turned amber. At this sstage, you’ll get a balanced mix of effects.

That said, timing can be adjusted based on personal preference:
- Earlier harvest (around 30% amber): Produces a more uplifting, energizing effect.
- Later harvest (up to 70% amber): Leads to higher cannabinol (CBN) levels, which create a heavier, more sedative effect.
Experimenting with harvest timing can help you find the results you prefer.
For step-by-step instructions, see our complete guide to harvesting cannabis.
Dry and Cure

Once you’ve cut down your plants, the next step is drying and curing. These are two crucial processes that determine how smooth, flavorful, and potent your final product will be. Skipping or rushing this stage often leads to harsh smoke and poor taste, so patience pays off here.
Drying is the first step after harvest. Hang your trimmed branches in a dark space with good airflow and low-to-moderate humidity. Removing excess leaves before drying is recommended; it helps buds dry faster and makes trimming easier later.
You’ll know drying is complete when each branch snaps cleanly instead of bending. This usually takes 7-14 days, depending on environmental conditions.

Once dry, it’s time to cure. Trim your buds from the stems, removing any remaining leaves until they resemble the look you want. Place the buds in airtight glass jars, filling them about three-quarters full to leave space for airflow and reduce the risk of mold.
Some growers break open a bud or two to let terpenes and resin disperse throughout the jar, enhancing the aroma and flavor.
Store jars in a cool, dark place and “burp” them regularly:
- First week – Open jars twice per day for 15-60 minutes.
- Second week – Once per day is enough.
- After two weeks – Every other day is fine.
The goal is to maintain 60-65% humidity inside the jars. A small hygrometer (humidity gauge) placed in each jar helps you monitor conditions precisely.
The minimum cure time should be at least two weeks, but longer is better. Many growers cure for 4-8 weeks, while some extend the process to 6 months for peak flavor and smoothness.
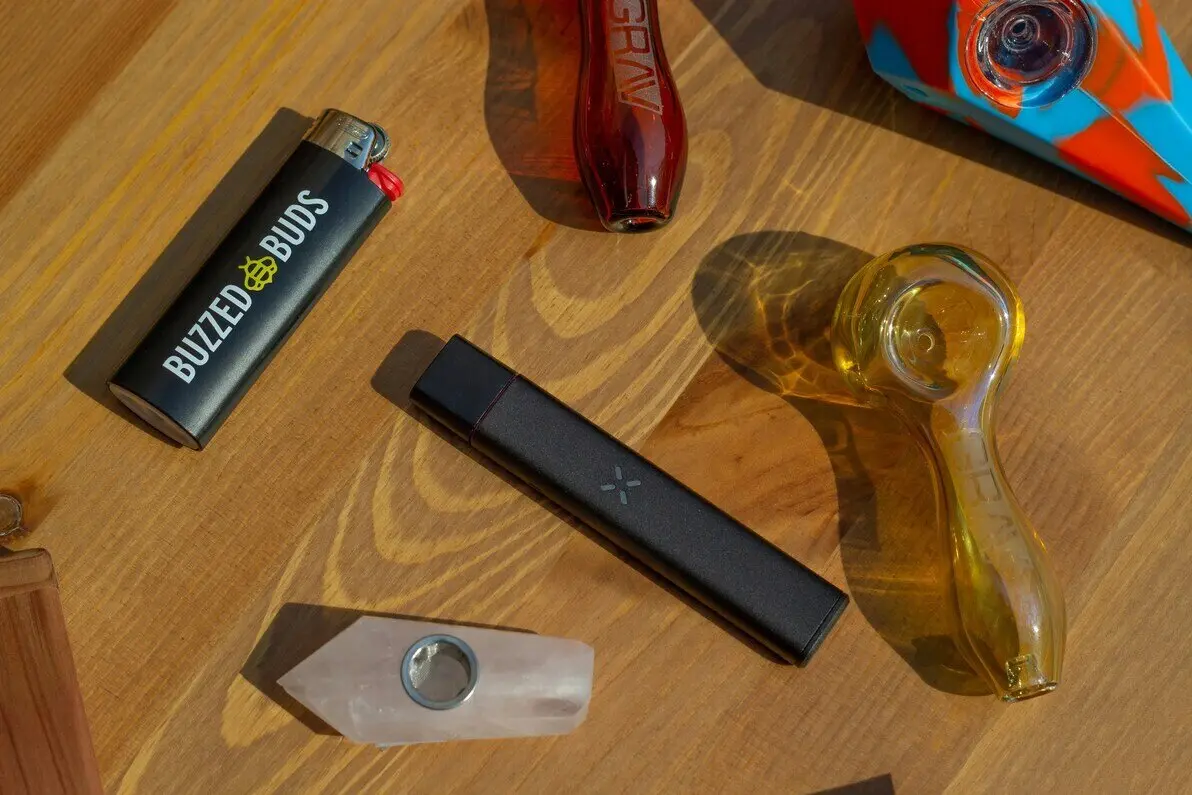
Ready to Smoke!
Congratulations, you’ve officially completed your cannabis grow! After weeks of germinating, training, flowering, harvesting, and curing, your buds are finally ready to enjoy.
At this stage, your fully cured cannabis should burn smoothly, taste rich, and deliver the effects you’ve been waiting for. Sit back, relax, and spark up – you’ve earned it!
How you enjoy your homegrown weed is entirely up to you. Some classic options include:
- Pipes or bongs for smooth, flavorful hits.
- Joints or spliffs if you prefer the ritual of rolling.
- Rosin pressing if you want to experiment with making your own concentrates.
No matter your method, smoking your own homegrown is one of the most rewarding parts of the process.
Just remember: the first grow is always the toughest. Each cycle teaches you something new, and your next harvest will only get better as you refine your techniques.
Frequently Asked Questions (FAQs)
The pH of soil affects how well plants absorb nutrients. For soil growing, aim for a pH around 6.0-7.0. If pH is too low or too high, nutrients can lock out, causing deficiencies.
Tap water can work, but it depends on its quality. If your tap water is hard, has high chlorine, or heavy metals, it may harm plants over time. Many growers use filtered or let tap water sit to dissipate chlorine, then check pH before watering.
Good airflow, clean equipment, and keeping humidity within proper ranges are key preventive steps. If pests or mold appear, you can use organic treatments (neem oil, insecticidal soap), prune affected areas, and isolate infected plants to prevent spread.
This depends heavily on your setup: size of grow space, wattage of lights, fans, and climate control equipment. A small setup with LEDs runs less than large HID or HPS lighting systems. Many indoor growers track kilowatt usage to estimate monthly costs.
Laws vary widely depending on where you live. Some places allow a limited number of plants for personal use; others ban home growing entirely. Always check your local regulations before startings any grow.